Kid rearing - the cold milk method
Firstly I should say that I am, always have been and always will be, a strong supporter of bottle feeding over the use of lambars and bulk feeders. If given the choice I will always prefer to use individual bottles, that way I know exactly how much milk each kid is getting - and if one doesnt finish its bottle it is a sure sign that they are feeling a bit sick, so you can treat it early. With traditional lambar feeding, bigger kids will guzzle more than smaller kids, and you can never be sure that each kid is getting the correct amount of milk. Lambars are also notoriously hard to clean, and we know that hygiene is of the utmost importance when rearing kids.
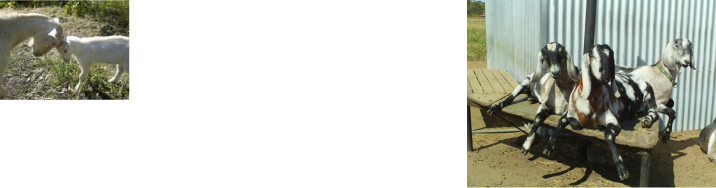
Having said all that, this year I decided to try a method of kid rearing known as ad lib cold milk feeding. Since my girls are show dairy goats, I prefer to take the kids off them at birth. This way I can milk mum right from the start and know what her milking potential is going to be, I can prevent any damage to the udder from overzealous kids, and both mum and kids are calm in the show ring. Additionally, in my area the demand is for bottle fed kids, and most of my kids are sold before they are born, and go to their new homes at 2 weeks old. So for these reasons I needed to bottle raise rather than dam rear the kids. However the problem I was facing is that I work full time - how exactly does one bottle feed kids from birth whilst working full time? Newborn kids as we know require 4 or 5 feeds a day when newborn, and 3 feeds a day until they are at least 4 weeks old.
This is why I looked at the cold milk system as the answer to my kid rearing problems. The idea with the cold milk system is that the kids are provided with milk ad lib at all times. The milk is kept chilled or at room temperature by using an old esky or drink cooler which is converted into a lambar style bulk feeder. Because the milk is cold, the kids will come to the feeder multiple times for small feeds, thus eliminating the risk of overeating and trying to mimic the multiple small feeds they would receive throughout the day if feeding from their mother. The milk is changed twice daily and kept cold by the addition of ice bottles to the feeder which prevents the milk from spoiling.
After reading a lot about this method on various websites, and emailing several people who raise their kids on this method very successfully, I decided to give it a try with this year's kids.
So the first thing I needed to do was build the feeder. I sort of had a rough idea of what I needed to do, but not really any clear step by step instructions so I sort of just winged it. Through trial and error I came up with something that seems to be working.
Basically you want to make a lambar, which essentially is simply a bucket with a bunch of teats attached to it, capable of feeding multiple kids at once. Except you want this lambar to be made out of an esky or cooler, instead of a bucket. There are two 'styles' of lambar; one has the teats at the bottom of the bucket, so the milk is gravity fed. The other has the teats at the top of the bucket, and a tube attached to the teat which runs down into the milk. The gravity fed lambars are great for young and/or weak kids as they give the kid milk as soon as they suckle on the teat, thereby encouraging them to continue drinking. The downfall is that these types of feeders tend to leak, and once the kids get bigger if they chew on the teats and damage them they will leak really badly and you may lose a bucket full of milk. On the other hand, the other style which has the tube attached to teats at the top of the bucket, will not leak from the teats; but the kids need to suck on the teat for a few seconds before the milk actually reaches the teat, so they are great for strong kids, but very young or weak kids can be discouraged if they suck and receive no milk.
Armed with this information, I planned to make two feeders; one with teats at the bottom to train the kids initially, and then a larger one with teats at the top for when they were bigger and stronger. So I set out to make these feeders.
Armed with this information, I planned to make two feeders; one with teats at the bottom to train the kids initially, and then a larger one with teats at the top for when they were bigger and stronger. So I set out to make these feeders.
My first obstacle came when I realised that no drill bit in my other half's tool box was going to come anywhere near close enough to the size hole I needed to pull the teats through, so off I went to Bunnings for a new drill bit. You will need a wood boring drill bit, sometimes called a spade head, which is 16mm or 5/8 '' in size. It cost me around $10.
Armed with my new drill bit, I went home and practised on a plastic bucket first before attacking the two eskies that I had bought for cheap at an op shop. The 16mm makes a neat hole in the bucket which is the perfect size for sticking teats through, and most lamb feeding teats fit through the same hole. More on teat choice later.
I drilled several holes in my test bucket both at the bottom and top, pulled the teats through and filled it with water. No leaks! Excellent! When I had a little test suck on the teats I got a mouthful of water, so it definitely worked. I thought I was all set to tackle the eskies.
The next obstacle came when I tried to drill through the first esky which I wanted to use for the gravity fed system. Unfortunately my new drill would go through the insulating layer but not the hard plastic inner shell. Note to self: do not use a you-beaut-super-dooper-hard core-heavy-duty esky for making a lambar.
My next tactic was to use the second esky and simply put teats both at the bottom and the top. I thought that was a fair compromise, weaker kids would figure out that the lower teats were easier to suck on, and the stronger teats would be bigger so would be able to reach the teats higher up. Unfortunately after drilling 8 holes top and bottom and threading all the teats through and filling with water I discovered a very important point: Teats at the bottom of a bucket do not leak, but teats at the bottom of an esky will leak badly due to the much thicker wall of the esky, the teat doesnt get a proper seal against the hole.
